Hayman Reese Electric Brake Controller Manual: A Comprehensive Guide
This manual provides detailed instructions for installing and operating your Hayman Reese electric brake controller. It covers the Guardian model,
featuring SmartClick wiring and sync control, ensuring safe and efficient trailer braking. Refer to haymanreese.com.au for additional resources.
Hayman Reese has long been a trusted name in Australian towing solutions, renowned for quality and innovation. Their electric brake controllers are designed to provide optimal braking performance for your trailer, enhancing safety and control while towing. This is achieved through proportional braking, applying the trailer brakes in direct relation to the vehicle’s braking force.
Electric brake controllers are essential for trailers equipped with electric brakes, particularly those exceeding a certain weight. They translate the driver’s braking input into a signal that activates the trailer’s brakes, ensuring synchronized and effective stopping power. The Hayman Reese range, including the Guardian model, utilizes advanced technology like SmartClick wiring for simplified installation and synchronization procedures.
Understanding the functionality of your Hayman Reese brake controller is crucial for safe towing. Features like gain adjustment allow you to tailor the braking force to suit the load and road conditions. Proper installation, as detailed in this manual and on resources like caravansplus.com.au, is paramount for reliable operation. Always consult the complete wiring harness instructions available at haymanreese.com;au for a secure connection.
Understanding Electric Brake Controllers
Electric brake controllers function as the crucial link between your tow vehicle and trailer’s braking systems. They receive a signal from the vehicle’s brake pedal and convert it into an electrical current that activates the trailer’s electromagnets, applying the brakes. Proportional controllers, like those from Hayman Reese, deliver braking force proportional to the vehicle’s deceleration, offering smoother and more controlled stops.
The core components typically include a control unit, a wiring harness, and a manual override function. The control unit houses the circuitry and adjustment controls, while the harness connects it to the vehicle’s electrical system and trailer. The manual override allows for independent application of the trailer brakes, useful in emergency situations, as highlighted by Reese Towpower’s Brakeman IV.
Key concepts include ‘gain’, which adjusts the intensity of the braking signal, and ‘synchronization’ – aligning the controller with the trailer’s brakes. Proper gain adjustment, often around 2.0 initially, is vital for optimal performance. Understanding LED indicators, signifying connection status and potential errors, is also essential for troubleshooting. Resources at haymanreese.com.au provide detailed wiring diagrams and installation instructions.
Hayman Reese Guardian: Overview
The Hayman Reese Guardian is a sophisticated electric brake controller designed for modern towing needs. It’s a compact, LED-equipped unit offering proportional braking control, enhancing safety and convenience. A standout feature is the SmartClick wiring system, simplifying installation and ensuring a secure connection – though a complete wiring harness is often sold separately.
This controller prioritizes ease of use with intuitive controls for gain adjustment and synchronization. The Guardian boasts a user-friendly interface, allowing drivers to quickly and accurately set the braking force to match trailer load and driving conditions. Its design focuses on providing a reliable and responsive braking experience.
The Guardian’s functionality extends to include a manual override, providing independent control of the trailer brakes when needed; It’s engineered for compatibility with a wide range of vehicles and trailers, making it a versatile choice for various towing applications. Detailed product information and installation guides are readily available at caravansplus.com.au and haymanreese.com.au.
Key Features of the Hayman Reese Guardian
The Hayman Reese Guardian distinguishes itself through several key features. Its SmartClick wiring system dramatically simplifies installation, offering a plug-and-play experience when paired with the appropriate wiring harness (sold separately). This system ensures a secure and reliable electrical connection.
Proportional braking is central to the Guardian’s performance, delivering smooth and controlled stopping power. LED indicators provide clear visual feedback on the controller’s status, including secure trailer connection and power output levels. A green light signifies a secure connection, as seen in models like the Reese Towpower 8507120 Brakeman IV.
Sync Control allows for precise synchronization with the trailer’s braking system, optimizing performance. The manual override function provides independent brake application when necessary, offering an extra layer of safety. Furthermore, the unit features a power output control, adjustable via the gain button, typically set around 2.0 for initial adjustment. Access to detailed wiring diagrams and instructions is available at haymanreese.com.au.
SmartClick Wiring System Explained
The Hayman Reese SmartClick system revolutionizes brake controller installation, offering a streamlined and user-friendly approach. Unlike traditional wiring methods, SmartClick utilizes a dedicated wiring harness – purchased separately – designed specifically for compatibility with Hayman Reese controllers. This “plug and play” feature significantly reduces installation time and complexity.
The system’s design prioritizes a secure and reliable connection, minimizing the risk of wiring errors. The harness connects directly to the vehicle’s existing towbar wiring, eliminating the need for splicing or complex modifications. This is particularly beneficial for those unfamiliar with automotive electrical systems.
Proper installation involves carefully routing the harness and securely connecting it to both the controller and the towbar wiring. Ensure the harness is protected from abrasion and heat sources. While the SmartClick system simplifies the process, a complete wiring harness is essential; it’s not included with the Guardian controller itself. Detailed wiring instructions are available on the Hayman Reese website: haymanreese.com.au.
LED Indicator Functions
The Hayman Reese Guardian brake controller utilizes a clear and intuitive LED indicator system to communicate its operational status. Understanding these indicators is crucial for proper functionality and troubleshooting. A green light signifies a secure and established connection with the trailer’s braking system, confirming successful synchronization.
Different LED patterns convey specific information. A flashing light may indicate a fault or an incomplete synchronization process, requiring attention before operation. The LED also reflects the controller’s power output level, providing a visual representation of the braking force being applied to the trailer.
Refer to the controller’s detailed diagram for a comprehensive understanding of each LED’s meaning. Regularly checking the LED indicator before and during towing ensures the system is functioning correctly. If an unusual pattern or a lack of illumination is observed, consult the troubleshooting section of this manual or visit haymanreese.com.au for further assistance. Proper LED function is vital for safe towing.
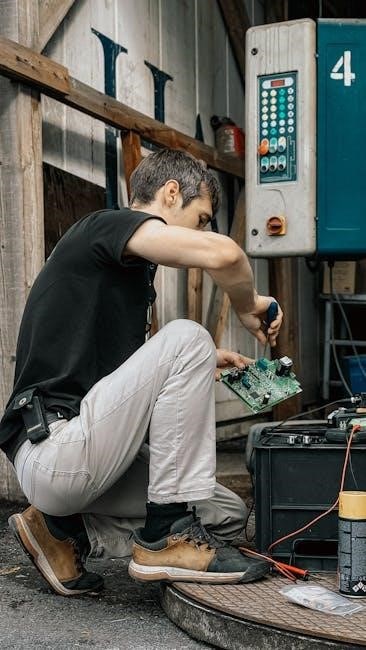
Installation Guide: Mounting the Controller
Proper mounting of the Hayman Reese Guardian brake controller is essential for safe and reliable operation. Begin by carefully selecting a mounting location within easy reach of the driver, ensuring it doesn’t interfere with vehicle controls or visibility. Before drilling, thoroughly inspect the area behind the chosen panel to confirm it’s clear of any wiring or components.
Utilize the mounting bracket as a template to accurately mark the hole locations. The unit must be mounted securely to a solid surface to withstand vibrations and ensure stable operation. Consider using appropriate fasteners for the vehicle’s dashboard material. Ensure the controller is firmly attached and doesn’t exhibit any wobble or movement.
Adhere to these guidelines: A) Secure mounting is paramount. B) Easy driver access is crucial. C) Clear space behind the panel is mandatory. Refer to haymanreese.com.au for detailed diagrams and additional installation support. A correctly mounted controller contributes significantly to towing safety.
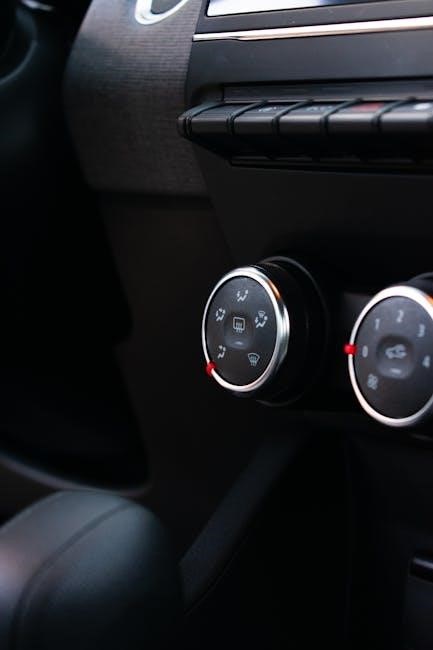
Mounting Location Requirements
Selecting the optimal mounting location for your Hayman Reese Guardian brake controller is critical for both functionality and safety. The chosen spot must be easily accessible to the driver while operating the vehicle, allowing for quick adjustments without distraction. Avoid locations that obstruct the driver’s view of the road or interfere with the operation of other vehicle controls.
Crucially, the mounting surface must be solid and capable of securely supporting the controller’s weight. Ensure there’s sufficient clearance behind the dashboard panel to accommodate the controller’s housing and wiring connections. Thoroughly inspect the area for existing wiring, ducts, or other obstructions before drilling any holes.
Remember these key requirements: A) Easy reach for the driver. B) A robust, solid mounting surface. C) Ample space behind the panel. Prioritize a location that minimizes vibration and ensures the controller remains firmly in place during travel. Refer to the official installation instructions at haymanreese.com.au for detailed guidance.
Wiring Harness Installation
Proper wiring harness installation is paramount for the correct operation of your Hayman Reese electric brake controller. Note that the complete wiring harness is often purchased separately, as it isn’t always included with the control unit itself. Begin by carefully routing the harness from the controller mounting location to the vehicle’s towbar wiring.
At the rear of the vehicle, identify the brake signal and electric brake wires within the towbar harness. Connect the corresponding wires from the Hayman Reese harness, ensuring a secure and weatherproof connection. Double-check all connections to prevent shorts or intermittent operation. Refer to the wiring diagrams available on haymanreese.com.au for vehicle-specific instructions.
The SmartClick wiring system is designed for quick and easy connection, but meticulous attention to detail is still essential. Ensure wires are properly insulated and protected from abrasion or damage. Secure the harness along its route using cable ties or clips to prevent it from interfering with other vehicle components. A secure and well-routed harness guarantees reliable performance.
Sync Control Procedure
The Sync Control feature is crucial for properly calibrating the Hayman Reese brake controller to your specific trailer’s braking system. This process establishes a secure connection and ensures optimal braking performance. Begin by ensuring the trailer is connected to the vehicle and the vehicle’s parking brake is engaged.
With the ignition switched on (engine off), locate the Sync button on the controller. While firmly holding down the brake pedal, press and hold either of the Sync buttons. The LED indicator will illuminate, signaling the synchronization process has begun. Continue holding both the brake pedal and the Sync button until the LED indicator confirms a successful connection – typically indicated by a green light.
If the synchronization fails, release the brake pedal and Sync button, then repeat the process. Ensure a stable 12V power supply to the controller during synchronization. Refer to the LED indicator functions section of this manual for detailed interpretations of the light signals. Successful synchronization is vital for safe towing.
Adjusting Brake Controller Gain
Proper gain adjustment is essential for matching the controller’s output to your trailer’s brake capacity, preventing over-braking or under-braking. Start with the gain set to its lowest setting. Slowly increase the gain using the Gain button – pushing it upwards (indicated by the “up” symbol) in small increments.
While slowly increasing the gain, repeatedly apply the trailer brakes at a consistent speed (around 30-40 mph) in a safe, open area. Observe the trailer’s braking response. The goal is to achieve smooth, controlled braking without wheel lockup or excessive trailer sway. If the trailer brakes too aggressively, reduce the gain.
Aim for an approximate gain setting of 2.0 as a starting point, but remember this is a guideline; Fine-tune the adjustment based on your specific trailer, vehicle, and load conditions. Regularly check and readjust the gain as needed, especially when changing trailer loads. Incorrect gain settings can compromise safety.
Gain Adjustment Steps
Begin by ensuring the vehicle and trailer are on a level surface and the ignition is switched on. With the trailer connected and properly wired, start the vehicle. Slowly depress the brake pedal and observe the LED indicator on the Hayman Reese controller – it should illuminate, confirming a connection.
Next, while continuously holding the brake pedal down, press either of the Sync buttons. This initiates the gain adjustment process. Gradually increase the gain using the “up” button, monitoring the trailer’s braking response during a slow, controlled test drive.
If the trailer exhibits excessive braking or wheel lockup, immediately reduce the gain using the “down” (-) button while still maintaining pressure on the brake pedal. Repeat this process of incremental adjustments until optimal braking performance is achieved. Remember to prioritize smooth, controlled stops over maximum braking force. Document your ideal gain setting for future reference.
Synchronizing the Controller with Trailer Brakes
Synchronization is crucial for optimal performance of your Hayman Reese electric brake controller. Begin with the vehicle and trailer connected, ensuring all wiring is secure, particularly utilizing the SmartClick system for a reliable connection. Turn the vehicle’s ignition to the ‘on’ position, but do not start the engine.
With the brake pedal firmly depressed, simultaneously press and hold one of the Sync buttons on the controller. The LED indicator will likely flash, signifying the synchronization process has begun. Maintain consistent pressure on the brake pedal throughout this procedure.
The controller automatically learns the trailer’s braking characteristics during synchronization. A successful sync is often indicated by a change in the LED indicator – typically a solid light. If synchronization fails, repeat the process, verifying the wiring and brake connections. Proper synchronization ensures proportional braking, enhancing safety and control.
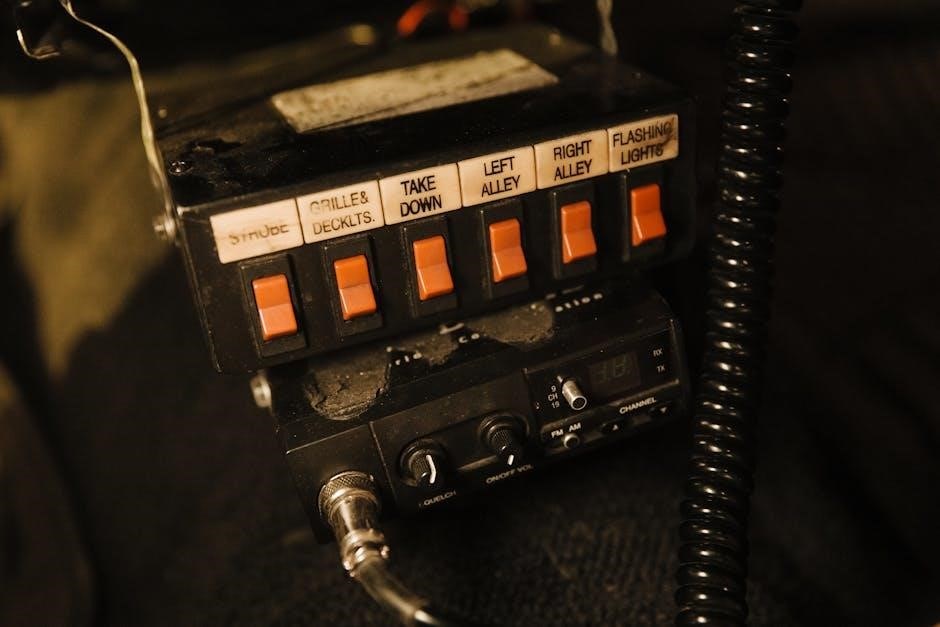
Manual Override Function
The Hayman Reese brake controller incorporates a manual override function, providing the driver with independent control over the trailer brakes. This feature is invaluable in emergency situations or when additional braking force is required beyond the proportional control. Locate the manual braking feature – often a lever or button – on the controller unit.
To activate manual braking, move the control lever to the left, or press the designated manual override button. This directly applies the trailer brakes, regardless of the vehicle’s braking system. Exercise caution when using this function, as it can induce skidding if applied aggressively, especially on slippery surfaces.
The intensity of manual braking is typically controlled by the position of the lever or the duration of button press. Release the manual control to return to proportional braking. Regularly test the manual override function to ensure it operates correctly, providing a vital safety backup during towing.
Using the Manual Braking Feature
Activating the manual braking feature on your Hayman Reese controller allows direct application of the trailer brakes, bypassing the proportional braking system. This is crucial for emergency stops or when needing extra stopping power. Locate the manual override button or lever on the control unit – it’s designed for quick access.
To engage manual braking, firmly press and hold the designated button or move the lever to the left. The trailer brakes will apply immediately. Modulate the pressure by adjusting how firmly you hold the button or the lever’s position; greater pressure equals stronger braking. Be mindful of potential skidding, particularly on wet or loose surfaces.
Release the button or lever to revert to the proportional braking mode. Practice using this feature in a safe, controlled environment to familiarize yourself with its responsiveness. Remember, the manual override is a supplementary safety tool, not a replacement for proper towing practices and regular brake maintenance.
Troubleshooting Common Issues
If your Hayman Reese controller isn’t functioning correctly, begin by checking the LED indicators for diagnostic clues. A lack of power indicates a wiring issue – verify the controller’s power and ground connections. If the LED flashes, consult the error code list (available at haymanreese.com.au) to pinpoint the problem.
For synchronization failures, ensure the trailer brakes are properly adjusted and the wiring harness is securely connected. Retry the sync control procedure, holding the brake pedal firmly while pressing the sync button. If the brakes feel weak, adjust the gain setting incrementally, testing after each adjustment.
If you encounter persistent issues, double-check all wiring connections, paying close attention to the towbar wiring harness. A faulty connection can cause intermittent problems. If problems persist, consult a qualified auto electrician or contact Hayman Reese customer support for assistance. Remember to always prioritize safety and avoid towing if the braking system is compromised.
Diagnostic Indicators and Error Codes
The Hayman Reese Guardian utilizes LED indicators to communicate system status and potential faults. A solid green light signifies a secure connection with the trailer, indicating proper operation. However, flashing or absent lights signal a problem requiring attention. Refer to the comprehensive error code list available on haymanreese.com.au for detailed explanations.
Specific error codes pinpoint the source of the issue, such as wiring faults, sensor malfunctions, or communication errors. For example, a rapid flashing red light might indicate a short circuit in the trailer wiring. Decoding these signals is crucial for efficient troubleshooting.
Understanding these indicators allows for quick diagnosis and resolution of common problems. Always consult the online resources for the most up-to-date error code definitions and troubleshooting steps. Ignoring diagnostic signals can lead to unsafe towing conditions, so prompt attention is vital. Proper interpretation ensures optimal brake controller performance and safety.
Power Output Control
The Hayman Reese Guardian features precise power output control, essential for matching brake force to trailer load and road conditions. This is managed via the Gain adjustment, allowing the driver to regulate the voltage sent to the trailer brakes. Adjusting to approximately 2.0 using the Gain button (upward arrow) is a common starting point.
The controller’s output is directly proportional to the applied brake pedal pressure and the set Gain level. Higher Gain settings deliver stronger braking force, suitable for heavier loads or slippery surfaces. Conversely, lower settings are appropriate for lighter loads or dry pavement.
Manual Override provides independent brake application to the trailer, useful for testing or emergency situations. The manual braking feature is activated by moving the control lever to the left. Careful adjustment of the Gain ensures optimal braking performance and prevents trailer sway, contributing to a safer towing experience. Always prioritize safe and controlled braking.
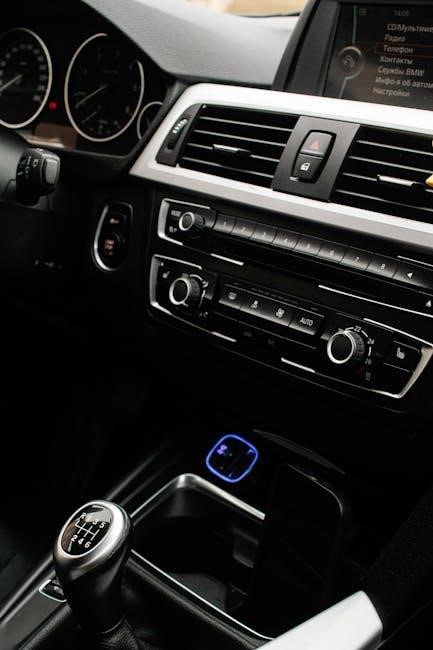
Compatibility and Vehicle Suitability
Ensuring compatibility is crucial before installing a Hayman Reese electric brake controller. These controllers are designed for vehicles equipped with a 12-volt electrical system and a suitable towbar wiring harness. The Guardian model, with its SmartClick wiring, simplifies connection, but a complete wiring harness may be required if not pre-installed.
Vehicle suitability depends on factors like electrical capacity and available mounting locations. The controller must be mounted securely to a solid surface, easily accessible to the driver, and with clear space behind the mounting panel for wiring. Check your vehicle’s owner’s manual for any specific electrical limitations or recommendations.
The Hayman Reese controllers are generally compatible with a wide range of vehicles, but professional installation is recommended to guarantee proper functionality and adherence to safety standards. Refer to haymanreese.com.au for detailed compatibility information and specific wiring diagrams for your vehicle model. Always verify the controller’s voltage matches your vehicle’s system.
Wiring Diagrams and Schematics
Accurate wiring is paramount for the safe and effective operation of your Hayman Reese electric brake controller. Detailed wiring diagrams and schematics are essential for both installation and troubleshooting. These diagrams illustrate the correct connections between the controller, the vehicle’s electrical system, and the trailer’s electric brakes.
Hayman Reese provides comprehensive wiring information on their official website, haymanreese.com.au, specifically within the ‘wiring instructions’ section. These resources detail how to source the brake signal and electric brake wires from the towbar wiring harness at the rear of the vehicle. Diagrams clearly show the connection points for power, ground, and brake signal wires.
The SmartClick wiring system simplifies connections, but understanding the underlying schematics is still vital. Ensure all connections are secure and properly insulated. Incorrect wiring can lead to controller malfunction or, more seriously, brake failure. Always consult a qualified auto electrician if you are unsure about any aspect of the wiring process.
Accessing Online Resources (haymanreese.com.au)
Hayman Reese’s official website, haymanreese.com.au, is an invaluable resource for owners of their electric brake controllers. The site offers a wealth of information, including downloadable manuals, detailed wiring instructions, and frequently asked questions. Accessing these resources can significantly aid in installation, operation, and troubleshooting.
Specifically, the website’s ‘wiring instructions’ section (repeatedly referenced as .com.au/wirin/instructions) provides crucial diagrams and schematics for connecting the controller to your vehicle and trailer. These resources are essential for ensuring correct installation and safe operation. You’ll find guidance on sourcing brake signals and electric brake wires from the towbar harness.
Beyond installation, the website may offer updated product information, compatibility guides, and support contact details. Regularly checking haymanreese.com.au ensures you have the latest information regarding your brake controller. Utilizing these online resources empowers you to maximize the performance and longevity of your Hayman Reese system.
Safety Precautions and Best Practices
Prioritizing safety is paramount when installing and operating your Hayman Reese electric brake controller. Always disconnect the vehicle’s battery before commencing any wiring work to prevent accidental shorts and electrical hazards. Ensure the controller is mounted securely to a solid surface, as specified in the installation guide – a loose controller can compromise braking performance.
Before drilling for mounting, meticulously verify the area behind the chosen panel is clear of wiring, fuel lines, and other critical components. Use the mounting bracket as a template to accurately mark hole locations, minimizing the risk of damage. Regularly inspect the wiring harness for any signs of wear, damage, or loose connections.
During operation, familiarize yourself with the manual override function and practice its use in a safe environment. Proper gain adjustment is crucial; excessive gain can lead to trailer wheel lockup, while insufficient gain compromises stopping power. Always test the braking system thoroughly before embarking on a journey, and adhere to all relevant road safety regulations.